Category Archives: Digital skills

The week our office turned into a photography studio!

With one of the main aims this year being to improve our online shop, myself and Darren decided to improve and update some stock photos. We enrolled in a crash course from resident photographer David Emeney and by the end of session thought we’d be able to do it, easy.

However, we came to find that photography is not as easy as it seems! First came the issue of space. Although David kindly allowed us to use his studio in the basement, with no computer nearby to check pictures and in fear of messing with any of his equipment, we though it may be best  if we set up a studio a little more close by.IMG_20170109_154103292_HDR

In true Blue Peter style Darren and I set about creating our own in-office photography studio by collecting bits and pieces from around the museum to mirror the one in the basement. Cardboard tubes were stapled together acting as a rod to hold the white background in place, this was held up by string wrapped multiple times around our window bars, counter tops were cleaned as to not make the paper dirty and even a staff noticeboard was used behind the paper to block out any natural light. Of course our office had to be rearranged first to fit such a project inside, a move which would have me non-stop sneezing for a few days as the settled dust was disturbed!

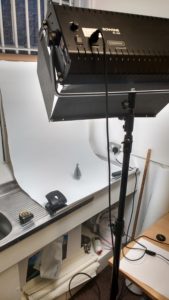
After a while of playing with the camera’s settings trying to find the right ones, we set to work to photograph stock. With thanks to Debs for letting us borrow geology’s light, the products came out well and the online shop now looks a lot smarter for it. Having this type of light was key to taking a good image, the close proximity between the product and source of light and changing the camera’s white balance when needed added extra quality.

It was a really good experience getting to know the manual settings of a camera and how each product requires a slight adjustment, also to be up to date with what products we currently have in store. I look forward to doing more stock photo shoots in the future and hope, at some point, to have all products photographed like this to keep a consistent look for the online shop.

£70 stoneSSGB edt 4559warrior duck 4857

My Digital Apprenticeship with Bristol Museums

My name is Lacey Trotman and I am currently in the fifth week of my Digital Apprenticeship with Bristol Museums. Having left college this June completing a 2 year A levels course in History, Art History, Sociology and Film Studies, the summer was spent searching for the right role for me. Despite College pushing for students to attend University – and many of my friends doing so, I felt the pressures of study and exams to degree level were not for me at this time. I chose instead to look at apprenticeships as it gave me a chance to put my skills into practical use in a real world setting.

Since starting on October 4th I have already begun to work on various projects broadening my range of skills and understanding: tackling the Discovery Pens, writing ‘How to’ guides, resizing images, composing surveys, working on the online shop, diving into the fast paced world of social media and editing blogs for the Museum website.

My first impression is that it’s an amazing place to work, with many opportunities to
undertake and progress.  It’s also clear to see that there is a lot of work going into such an institution with many more departments behind the scenes than I could possibly have imagined.

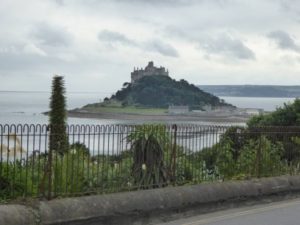
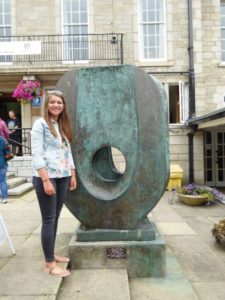
I have always loved visiting museums and galleries. As a proud Bristolian I feel Bristol Museums provide some of the best in the country. Growing up, family holidays were full of excurst-michaels-mountsions to castles and places of historical interest. Most recently, we visited St Michael’s Mount in Cornwall. Our seaside cottage faced the historic site making for picturesque views at all times. With Poldark loving parentbarbara-hepworths we also visited the historic mines and ruins of work houses on the Cornish coast. Cornwall was also the home to legendary artist Barbara Hepworth, one of my key artists to feature in the Art History exam I completed this year; so I was thrilled
to see an original piece by her on our day trip to St. Ives.  Even better is that a few weeks after starting this apprenticeship, Winged Figure was newly installed in the gallery confirming this is definitely the best place to work!

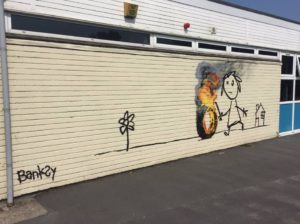
Throughout my childhood I visited all the venues that come under the Bristol Museums canopy. My first trip to The Red Lodge Museum, was with Primary School. I remember being asked by the staff if I wanted to dress as Queen Elizabeth I for the class picture, but afraid of the spotlight I volunteered my best friend instead! Blaise Castle was always a childhood favourite of mine and I can also remember visiting the old Industrial Museum with its variety of transport, planes and trucks. However I banksywas delighted when the new M Shed opened offering fun and interactive features for free. I have not yet gotten over missing the iconic Banksy vs Bristol Museum exhibition or Dismaland, just 40 minutes away in Weston. With such strong links to Bristol, Banksy is a favourite artist of mine. Recently he paid my old Primary School a visit leaving a large mural on their classroom wall.

The next two years fill me with excitement and expectation. The addition of a marketing qualification will add further qualifications to my growing C.V.  I hope to excel in my role growing in both confidence and ability; I am keen to ensure I make the most of this experience and hope that all I have to offer will been seen as a positive addition to the hardworking Digital Team.

Digital Curating Internship – an update

By David Wright (Digital Curating Intern, Bristol Culture)

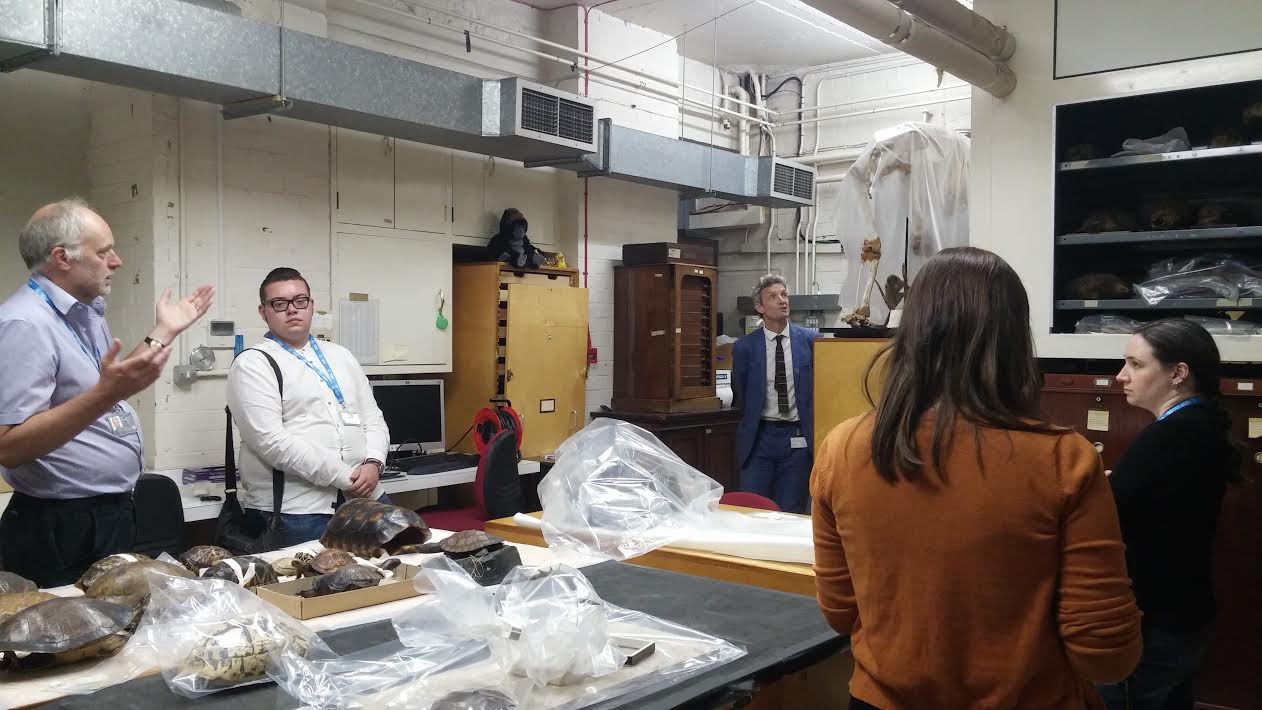
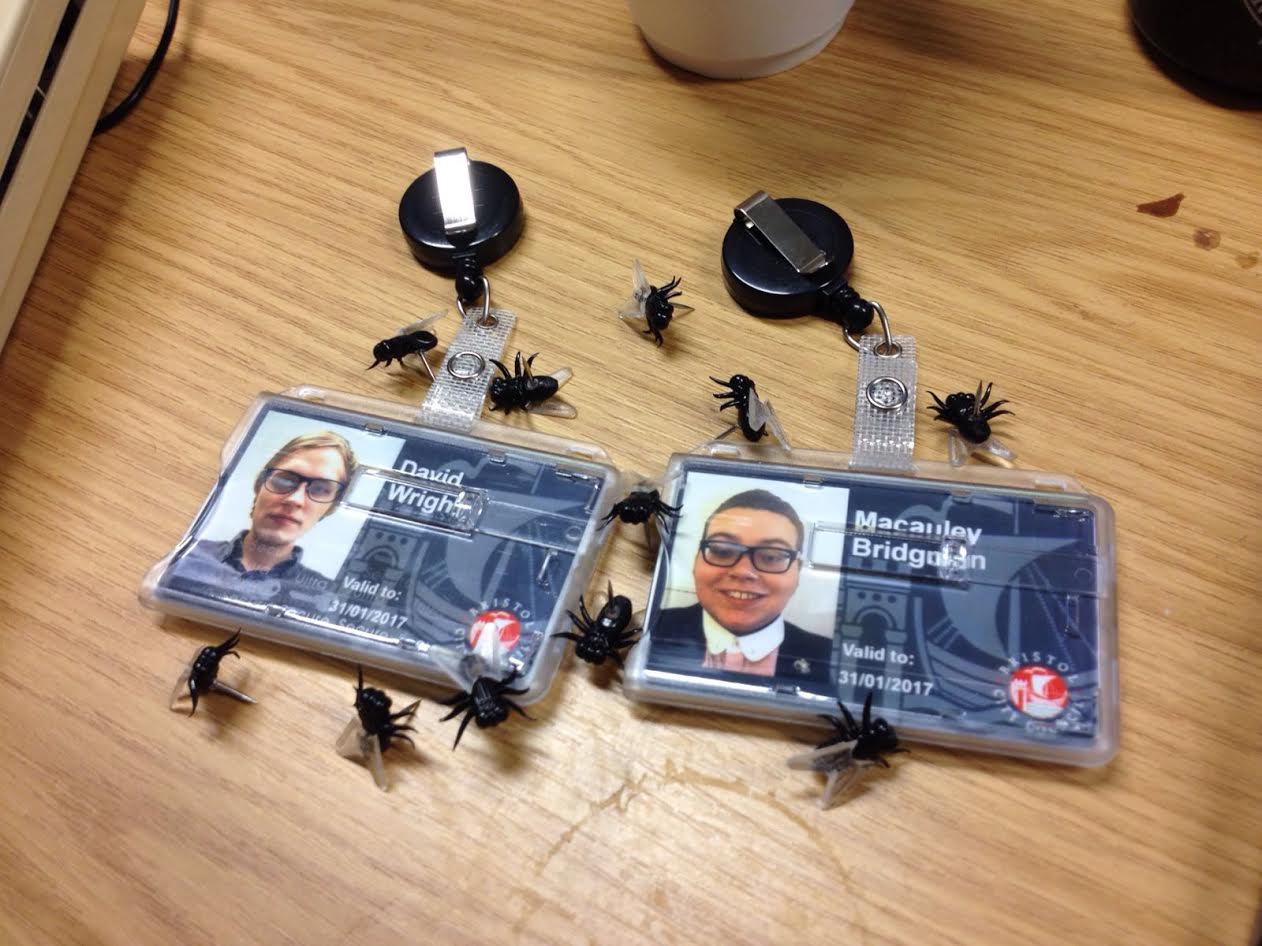
Both Macauley Bridgman and I are now into week six of our internship as Digital Curating Assistants here at Bristol Culture (Bristol Museums) . At this stage we have partaken in a wide array of projects which have provided us with invaluable experiences as History and Heritage students (a discipline that combines the study if history with its digital interpretation) at the University of the West of England. We have now been on several different tours of the museum both front of house and behind the scenes. Most notably our store tour with Head of Collections Ray Barnett, which provided us with knowledge of issues facing curators nationwide such as conservation techniques, museum pests and the different methods of both utilisation and presentation of objects within the entirety of the museum’s collection.

pic from stores

In addition we were also invited to a presentation by the International Training Programme in which Bristol Museums is a partner alongside the British Museum. Presentations given by Ntombovuyo Tywakadi, Collections Assistant at Ditsong Museum (South Africa), followed by Wanghuan Shi, Project Co-ordinator at Art Exhibitions China and Ana Sverko, Research Associate at the Institute of Art History (Croatia). All three visitors discussed their roles within their respective institutions and provided us with a unique insight into curating around the world. We both found these presentations both insightful and thought provoking as we entered Q&A centred on restrictions and limitations of historical presentation in different nations.

Alongside these experiences we have also assumed multiple projects for various departments around the museum as part of our cross disciplinary approach to digital curating.

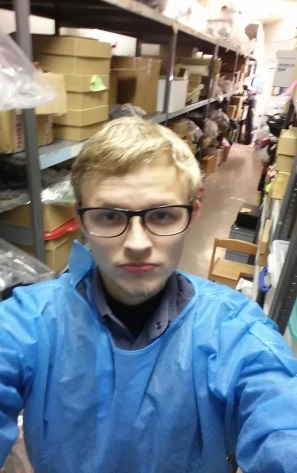
Our first project involved working with Natural Sciences Collections Officer Bonnie Griffin to photograph, catalogue and conserve Natural History specimens in the store. This was a privileged assignment which we have perhaps found the most enjoyable. The first hand curating experience and intimate access with both highly experienced staff and noteworthy artefacts we both found inspiring in relation to our respective future careers.

David Wright
David Wright – Digital Curating Intern

Following on from this we undertook a project assigned by Lisa Graves, Curator for World Cultures, to digitise the outdated card index system for India. The digital outcome of this will hopefully see use in an exhibition next year to celebrate the seventieth anniversary of Indian independence in a UK-India Year of Culture. At times we found this work to be somewhat tedious and frustrating however upon completion we have come to recognise the immense significance of digitising museum records for both the preservation of information for future generations and the increased potential such records provide for future utilisation and accessibility.

We have now fully immersed ourselves into our main Bristol Parks project which aims to explore processes by which the museum’s collections can be recorded and presented through geo-location technology. For the purposes of this project we have limited our exploration to well-known local parks, namely Clifton and Durdham Downs with the aim of creating a comprehensive catalogue of records that have been geo-referenced to precise sites within the area. With the proliferation of online mapping tools this is an important time for the museum to analyse how it records object provenance, and having mappable collections makes them suitable for inclusion in a variety of new and exciting platforms – watch this space!. Inclusive of this we have established standardised procedures for object georeferencing which can then be replicated for the use of future ventures and areas. Our previous projects for other departments have provided the foundation for us to explore and critically analyse contemporary processes and experiment with new ways to create links between objects within the museum’s collections.

id cards

As the saying goes “time flies when you are having fun”, and this is certainly true for our experience up to date. We are now in our final two weeks here at the museum and our focus is now fervently on completing our Bristol Parks project.

Google Drive for Publishing to Digital Signage

Having taken an agile development approach to our digital screen technology, it has been interesting as the various elements emerge based on our current needs. Lately there has been the need for quick ways to push posters and images to the screens for private events and one-off occasions.

Due to the complexity of the various modes, and the intricacies of events-based data and automatic scheduling it has been difficult incorporating these needs into the system. Our solution was to use Google Drive as a means to override the screens with temporary content. This means our staff can manage content for private events using tables and mobile devices, and watch the updates push through in real time.

The pathway of routes now looks like this

Untitled Diagram (1)

HOW?

There are two main elements to the override process – firstly, we are using BackboneJS as the application framework because this provides a routing structure that controls the various signage modes. We added a new route at the beginning of the process to check for content added to Google Drive – if there is no content the signs follow their normal modes of operation.

Google Drive Integration

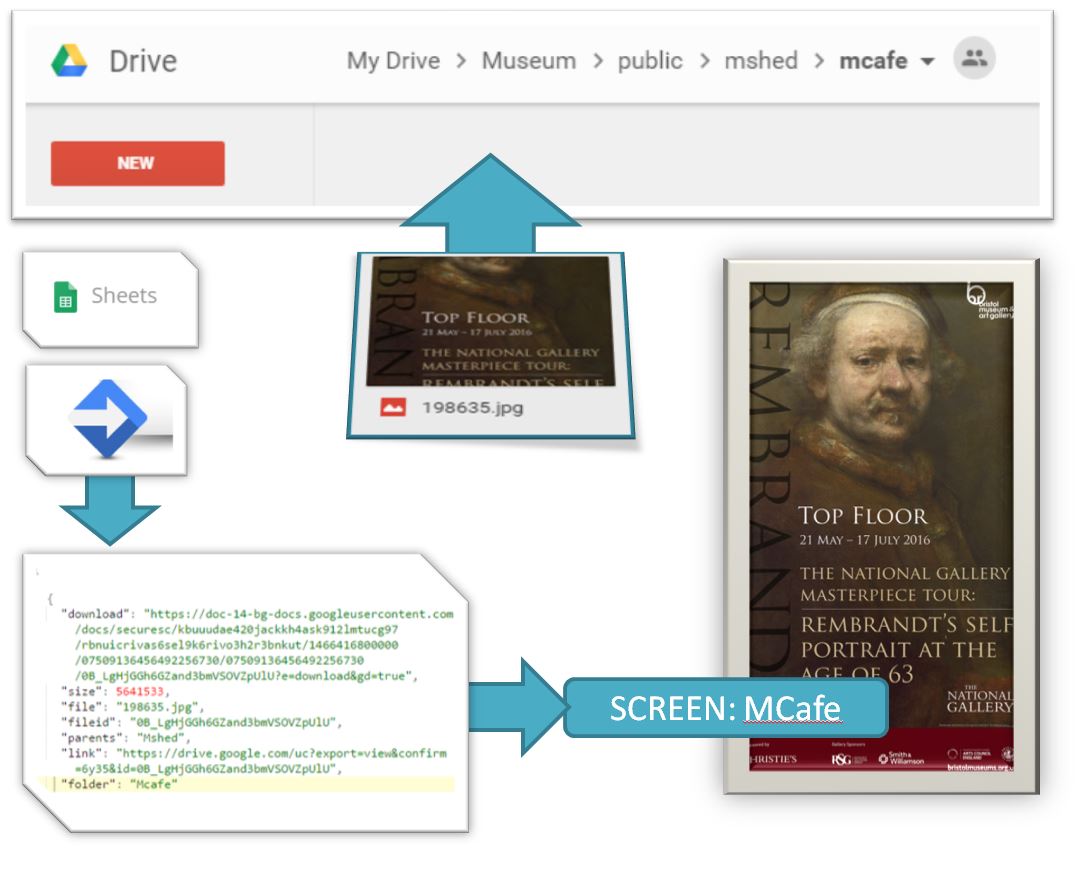
Google provide a nice way to publish web services, hidden amongst the scripts editor inside Google sheets. We created a script that loops through a Drive directory and publishes a list of contents as JSON –  you can see the result of that script here. By making the directory public, any images we load into the drive are picked up by the script. The screens then check the script for new content regularly. The good thing about this is that we can add content to specially named folders – if the folder names match either the venue or the specific machine name – all targeted screens will start showing that content.

Google drive integration

It seems that this form of web hosting will be deprecated in Google Drive at the end of August 2016. But the links we are using to get the image might still work. If not we can find a workaround – possibly by listing urls to content hosted elsewhere in the Google sheet and looking that up.

The main benefits of this solution are being able to override the normal mode of operation using Google Drive on a mobile device. This even works with video – we added some more overrides so the poster mode doesn’t loop till the next slide until after the video has finished – video brings in several issues when considering timings for digital signage. One problem with hosting via Google Drive is that files over 25MB don’t work due to Google’s antivirus checking warning which prevents the files being released.

We’ll wait to see if this new functionality gets used – and if it is reliable after August 2016. In fact – this mode might be usable on its own to manage other screens around the various venues which until now were not up datable. If successful it will vastly reduce the need to run around with memory sticks before private events – and hopefully let us spend more time generating the wonderful content that the technology is designed to publish for our visitors.

You can download the latest release and try it for yourself here.


Getting an archival tree-view to sort properly online

The digital team at Bristol Culture face new challenges every day, and with diverse collections come a diverse range of problems when it comes to publishing online. One particularly taxing issue we encountered recently was how to represent and navigate through an archives collection appropriately on the web.

Here’s what Jayne Pucknell, an archivist at the Bristol Record Office, has to say:

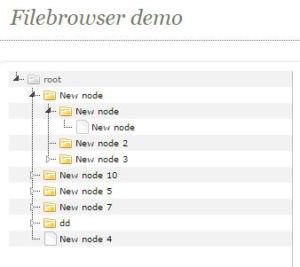
“To an archivist, individual items such as photographs are important but it is critical that we are able to see them within their context. When we catalogue a collection, we try to group records into series to reflect their provenance, and the original order in which they were created. These series or groups are displayed as a hierarchical ‘tree view’ which shows that arrangement.”

So far so good – we needed to display this tree-view online, and it just so happens there is a useful open source jquery plugin to help us achieve that, called jsTree.

Capture

The problem we found when we implemented this online, was that the tree view did not display the archive records in the correct order. The default sort was the order in which the records had been created, and although we were able to apply a sort to the records in our source database (EMu), we were unable to find a satisfactory sorting method that returned a numerical sort for the records based on their archival reference number. This is because the archival reference number is made up from a series of sub-numbers reflecting sub collections.

So this gave us a challenge to fix, and the opportunity to fix it was possible because of the EMu API and programming  in between the source database and collections online.  The trick was to write a php function that could reorder the archive tree before it was displayed.

Well, we did that and here’s a breakdown of what that function does:

The function takes 2 arguments – the archival number as a text string, and the level in the archive as an integer.

1.) split the reference number into an its subnumbers
2.) construct a new array from the subnumbers
3.) perform a special sort on the new array that takes into account each subnumber in turn

in theory that’s it – but looking at the code in hindsight there are a whole heap of complexities that would take longer to articulate here than just to past in the code, so lets make it open source and leave you to delve if you wish – here’s the code on Github

Another subtle complexity in this work is described further by Jayne:

“You may search and find an individual photograph and its catalogue entry will explain the specific content of that image, but to understand its wider context it is helpful to be able to consider the collection as a whole. Or you may search and find one photograph of interest but then want to explore other items which came in with that photograph. By displaying the hierarchy, you are more easily able to navigate your way through the whole collection.”

Because of the way our collections online record pages are built – a record does not immediately contain links to all its parents or children. This is problematic when building the archives tree as ideally we wish each node to link to the parent or child depicted. We therefore needed a way to get the link for each related record whilst constructing the tree. Luckily we maintain the tree structure in EMu via the parent field.

The solution was to query the parent field and get the children of that parent, then loop through each child record and add a node to the tree. This process could be repeated up the parents until a record with no parents was reached and this would then become the root node. Because the html markup was the same for each node, this process could be written as a set of functions:

1.) has_parent: take a record number and perfom a  search to see if it has a parent, if it does return the parent id.

2.) return_children: take a record number, search for its child records and return them as an array

2.) child_html: take an array of child records and construct the links for each in html

Taking advice from Jonathan Ainsworth from the University of Leeds Special Collections, who went through similar issues when building their online pages, we decided not to perform this recursively due to the chance of entering an infinite loop or incurring too much processing time. Instead I decided to call the functions for a set number of levels in the tree – this works as we did not expect more than seven levels. The thing to point out is that when you land on a particular record, the hierarchical level could be anything, but the programmed function to build the tree remains the same.

Here’s the result – using some css and the customisable features in jsTree we can indicate which is the selected record by highlighting. We also had to play around with the jsTree settings to enable the selected record to appear, by expanding each of its parent nodes in turn – to be honest it all got a bit loopy!

Capture

….here’s the link to this record on our Collections Online.

Hope this is of use to anyone going through similar issues – on the face of it the problem is a simple one, but as we are coming to learn in team digital – nothing is really ever just simple.


A week in the Bristol Museums digital team

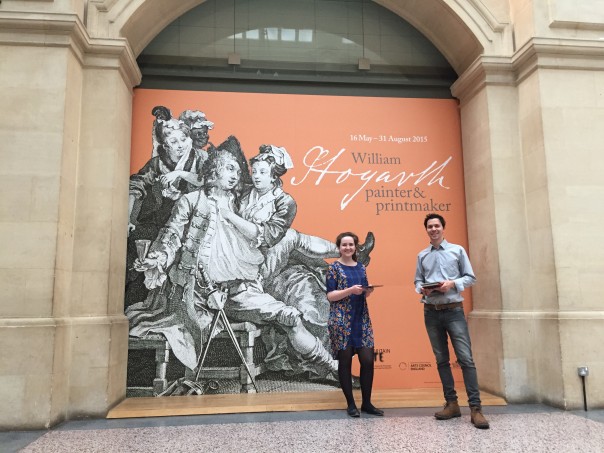
rachel-and-darrenHello! My name’s Rachel and I’m a Heritage Lottery Fund Skills for the Future graduate trainee. I am usually based in Worcester as part of the Worcestershire’s Treasures project, with my traineeship focused on audience development and events. As part of the traineeship I’m able to do a week’s secondary placement at another museum or heritage venue, and this week I joined the Bristol Museums digital team to get an insight into what they do, and generally learn some new stuff. I got in touch with Zak and Fay as I knew I wanted to spend my week elsewhere learning more about museums and digital. I had seen both of them speak at conferences – Zak at the Museums Association’s annual conference in Cardiff, and Fay at Culture 24’s Digital Change: Seizing The Opportunity Online in Birmingham – and thought Bristol seemed like the place to be for museums and digital!

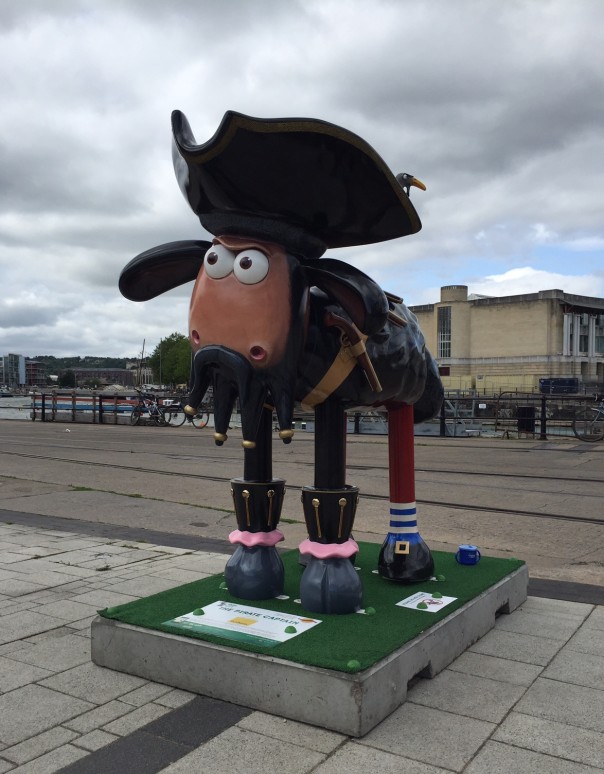
I’ve been involved with some really interesting and useful things since the start of the week. On Monday I did some content management on the development site in preparation for user testing later on in the week. On Tuesday I sat in on a meeting with fffunction, and then joined the museum’s new digital marketing intern, Olivia, in creating some content for social media. As the Shaun the Sheep trail started this week, we had fun coming up with some awful sheep-related puns – keep an eye out for these on @bristolmuseum! pirate_shaunOn Wednesday I visited The Georgian House Museum and The Red Lodge Museum, conducted some visitor surveys down at M Shed, and then yesterday I sat in on some user testing sessions with teachers, for the new learning pages of the website. They were given a number of scenarios to work through and it was really fascinating to see how users interact with the site and the different ways people navigate through it.

Some of the other useful things I’ve been introduced to this week are the organisation’s Audience Development Strategic Plan and their social media guidelines, and how data collected from users is collated and reported.  I also sat in on a meeting with some of the team involved with the upcoming exhibition death: the human experience to discuss the digital engagement to go alongside the physical exhibition and programme. This is just one example of the collaborative nature of the digital offer, and it came across to me that it is viewed as an integrative part of the exhibition, as opposed to just an add-on, which is really positive.

It’s also been great seeing how a different museum works. The museum I work at is quite different, in terms of size, staffing, collection and audience, and so coming to a large local authority museums service with seven physical sites has been a valuable experience in itself.

Overall I have had a brilliant week, I think it’s been a good overview of the team’s work, with lots of variety and things to get involved with. I have felt really welcome and included, and everyone at the museum has been so friendly. Thanks so much to the team for hosting me this week, and especially to Fay for letting me follow her round for most of it. My traineeship comes to an end shortly, so hopefully you’ll see me on a digital team soon!

Anatomy of our Digital Signage Web App

At this stage in the development of our digital signage, we have a working release of the software in the live environment, and we are focussing on training, improvements to the design and data structure for the next version. This post is about the nuts and bolts of how the client-side app works, while it is still fresh.
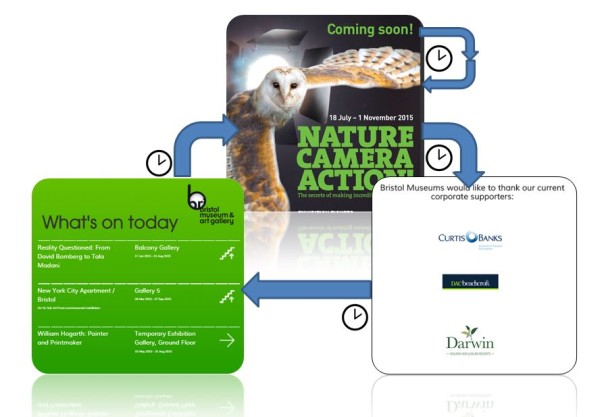
Mode Schematic

Firstly, it is a single page web application – loaded upon calling index.html from a web browser.  Inside the index.html are just the basics you’d expect. The magic is all controlled via a master JavaScript file called require.js. This library is used to pull together all of the source code in the right order and makes sure files don’t get loaded twice etc. All of the content of the app is loaded and removed via a single content div in the body.

index.html 
(... some bits removed...check the GitHub page for the whole lot)


<html>
  <head><title>BMGA Digital Signage</title>
     <link rel="stylesheet" href="css/styles.css"> 
     <script data-main="js/main" src="js/libs/require/require.js"/>    
  </head>
  <body class="nocursor">
   <div id="mainContent" > </div></div>
  </body>
</html>

The first JavaScript to load up is main.JS. This simple file follows theRequireJS format, which is used to alias some of the code libraries which will get used the most such as JQuery.

//main.js 

require.config({

 paths:{
     jquery:'libs/jquery/jquery-min',
     underscore:'libs/underscore/underscore-min',
     backbone:'libs/backbone/backbone-min', 
     templates: '../templates'
 }
 })

require([

"app"], function(App) {
App.initialize();
});

Next up is main.js. This loads up the code libraries required to start the app, and brings in our first global function – used to close each ‘view’. For a single page app it is really important to destroy any lingering event handlers and other bits which can take up memory and cause the app to go a bit crazy – something that Backbone apps have difficulties with, and otherwise known as Zombie Views. Killing Zombies is important.

//main.js
define([
 'jquery', 
 'underscore', 
 'backbone',
 'router'

], function($, _, Backbone, Router){
var initialize = function(){

 
  Backbone.View.prototype.close = function () { //KILL ZOMBIE VIEWS!!!!
      this.undelegateEvents();
      this.$el.empty();
      this.unbind();
  };
 

   Router.initialize();
 };

 return { 
     initialize: initialize
 };
});

It gets a bit more fun next as we call the backbone ‘router’ – and from now on I’ll only add snippets from the files, to see the lot head to GitHub. The router is what drives navigation through each of the modes that the screens can display. Each route takes its parameters from the url and so this means we can control the modes by appending the text ‘sponsors’, ‘posters’ or ‘events’ to the index.html in the browser.

In addition to the mode we can pass in parameters – which poster to display, which page of sponsors, which venue etc. This was a solution to the problem of how to remember which posters have not yet been shown. If you only wish the poster mode to last 40 seconds, but you’ve got lots of posters – you need to remember which posters come next in the sequence. Additionally as you loop through modes, you need to pass along each parameter until you are back on poster mode. This is why every route has all the parameters for venue and poster.

This slightly convoluted situation has arisen as we are using a page refresh to flip between modes and so without relying on local storage our variables are only around as long as the page lasts

//router.js 

 var AppRouter = Backbone.Router.extend({
 routes: { 
 'sponsors(/venue:venue)(/stick:stick)(/logo:page)(/poster:page)(/machine:machine)': 'sponsors', 
 'posters(/venue:venue)(/stick:stick)(/logo:page)(/poster:page)(/machine:machine)': 'posters', 
 'events(/venue:venue)(/stick:stick)(/logo:page)(/poster:page)(/machine:machine)(/date:all)':'events',

 }
 });

The code for a single route looks a bit like this and works as follows.  We start off with an option to stick or move – this allows us to have a screen stay on a particular mode. Then we look at our settings.JSON file which contains the machine specific settings for all of the signs across each venue. The machine name is the only setting help locally on the system and this is used to let each machine find their node of settings (loop times, etc.).

...
 app_router.on('route:posters', function(venue,stick,logoOffset,posterOffset,machine){
 
 
 var stick = stick || "move"
 var logoOffset=logoOffset||0
 var posterOffset=posterOffset||0;
 
 machineName=machine||'default'
 Allsettings=(JSON.parse(Settings))
 settings=Allsettings.machineName
 settings=('Allsettings',Allsettings[machineName])
 
 
 var venue = settings.location;
 
 if(Globals.curentView){
 Globals.curentView.close()
 }
 
 var venue = venue || "ALL"
 self.venue=venue
 
 var posterView = new PosterView({venue:self.venue,stick: stick,logoOffset:logoOffset,posterOffset:posterOffset,machine:machine,settings:settings,type: settings.eventTypes});
 
 posterView.addPostersFromLocaLFile();
 Globals.curentView=posterView


 }),
....

With all settings loaded, and filtered by machine name and the mode specified – we are ready to load up the view. This contains all of the application logic for a particular mode, brings in the html templates for displaying the content, and performs the data fetches and other database functions needed to display current events/posters…more on that in a bit

Amongst the code here are some functions used to check which orientation the image supplied is, and then cross reference that with the screen dimensions, and then check if that particular machine is ‘allowed’ to display mismatched content. Some are and some aren’t, it kinda depends. When we push a landscape poster to a portrait screen, we have lots of dead space. A4 looks OK on both but anything squished looks silly. So in the dead space we can display a strapline, which is nice, until there is only a tiny bit of dead space. Oh yep, there is some code to make the font smaller for a bit if there is just enough for a caption..etc.   ….turns out poster mode wasn’t that easy after all!

//view.js
 
define([
 'jquery',
 'underscore',
 'backbone',
 'text!templates/posters/posterFullScreenTemplate_1080x1920.html',
 'text!templates/posters/posterFullScreenTemplate_1920x1080.html',
 'collections/posters/PostersCollection',
 'helpers/Globals',
], function($, _, Backbone, posterFullScreenTemplate ,posterFullScreenTemplateLandscape,PostersCollection,Globals){

 var PosterView = Backbone.View.extend({
 
 el: $("#eventsList"),
 
  addPostersFromLocaLFile: function(){ 
 
 var self = this;
 self.PostersCollection = new PostersCollection({parse:true}) 
 self.PostersCollection.fetch({ success : function(data){
 self.PostersCollection.reset(data.models[0].get('posters'))
 self.PostersCollection=(self.PostersCollection.byEventType(self.settings.eventTypes));
 self.PostersCollection=(self.PostersCollection.venueFilter(self.venue));
 self.renderPosters(self.PostersCollection)
 
 $( document ).ready(function() {
 
 setInterval(function(){ 
 
 self.renderPosters(self.PostersCollection)
 if(self.stick=="move"){ 
 setTimeout(function() { 
 self.goToNextView(self.posterOffset)
 }, settings.posterMode_time * 1000);
 }
 }, settings.posterLoop_time * 1000);
 })
 
 }, dataType: "json" });
 
 },
 
 renderPosters: function (response) { 

 if( self.posterOffset>= response.models.length){self.posterOffset=0}
 
 var width = (response.models[self.posterOffset].get('width'))
 var height = (response.models[self.posterOffset].get('height'))
 LANDSCAPE=(parseInt(width)>=parseInt(height))
 ImageProportion = width/height 
 
 if(LANDSCAPE==true){break;}
 self.posterOffset++ 
 }
 }
 
 if(self.orientationSpecific==2){
 
 //enforced orientation lock
 while(LANDSCAPE==false ){ 
 
 if( self.posterOffset>= response.models.length){self.posterOffset=0}
 
 var width = (response.models[self.posterOffset].get('width'))
 var height = (response.models[self.posterOffset].get('height'))
 LANDSCAPE=(parseInt(width)>=parseInt(height))
 if(LANDSCAPE==true){break;}
 self.posterOffset++ 
 }
 }
 
 ImageProportion = width/height 
 if(ImageProportion<=0.7){miniFont='miniFont'}
 if(ImageProportion<=0.6){miniFont='microFont'}
 if(ImageProportion<=0.5){miniFont='hideFont'}
 if(ImageProportion>=1.4){miniFont='hideFont'}
 console.log('ImageProportion'+ImageProportion) 
 self.$el.html(self.PostertemplateLandscape({poster: response.models[self.posterOffset],displayCaption:displayCaption,miniFont:miniFont},offset=self.posterOffset,TemplateVarialbes=Globals.Globals)); 
 

 ....


return PosterView;
 
});

Referenced by the view is the file which acts as a database would do, called the collection, and there is a collection for each data type. The poster collection looks like this, and its main function is to point at a data source, in this case a local file, and then to allow us to perform operations on that data. We want to be able to filter on venue, and also on event type -(each machine can be set to filter on different event types)  and so below you see the functions which do this… and they cater for various misspellings of our venues just in case 🙂

//postercollection.js 

define([
 'underscore',
 'backbone',
 'models/poster/posterModel'
], function(_, Backbone, SponsorModel){

 var PosterCollection = Backbone.Collection.extend({
 
 sort_key: 'startTime', // default sort key
 

 url : function() {
 var EventsAPI = 'data/posters.JSON'; 
 return EventsAPI
 },
 
 byEventType: function(typex) { 
 typex=typex.toUpperCase()
 filteredx = this.filter(function(box) {
 
 var venuetoTest = box.get("type")
 
 if( box.get("type")){
 venuetoTest = (box.get("type").toUpperCase())}
 
 
 return typex.indexOf(venuetoTest) !== -1;
 }); 
 return new PosterCollection(filteredx);
 },


 venueFilter: function(venue) { 

 if(venue.toUpperCase()=="M SHED"){venue = "M SHED"}
 if(venue.toUpperCase()=="BMAG"){venue = "BRISTOL MUSEUM AND ART GALLERY"}
 if(venue.toUpperCase()=="MSHED"){venue = "M SHED"}
 filteredx = this.filter(function(box) {
 var venuetoTest = box.get("venue")
 
 if( box.get("venue")){
 venuetoTest = (box.get("venue").toUpperCase())}
 
 return venuetoTest==venue ||box.get("venue")==null
 }); 
 return new PosterCollection(filteredx);
 
 },
 
 parse : function(data) { 
 return data 
 }

 
 });

 return PosterCollection;

});

Referenced by the collection is the model – this is where we define the data that each poster record will need. One thing to watch here is that the field names match exactly those in the data source. When backbone loads in data from a JSON file or API, it looks for these field names in the source data and loads up the records accordingly (models in backbone speak) . So once the source data is read, we populate our poster collection with models, each model contains the data for a single poster etc.

//postermodel.js


 define([
 'underscore',
 'backbone'
], function(_, Backbone) {

 PosterModel = Backbone.Model.extend({

 defaults: {
 
 category: 'exhibition',
 irn: '123456' ,
 startDate: '01/01/2015' ,
 endDate: '01/01/2015' ,
 venue: 'MSHED' ,
 caption: 'caption' ,
 strapline: 'strapline' ,
 copyright: '© Bristol Museums Galleries and Archives' 
 

 },
 initialize: function(){
 //alert("Welcome to this world");
 },
 adopt: function( newChildsName ){
 // this.set({ child: newChildsName });
 }
 })

 return PosterModel;

});

With the collection loaded with data, and all the necessary venue and event filters applied, it is time to present the content – this is where the templates come in. A template is an html file, with a difference. The poster template contains the markup and styling needed to fill the screen, and uses the underscore library to insert and images into the design.

/*posterFullScreenTemplate_1080x1920.html */

<style>

body{
    background-color:black;
    color: #BDBDBD;
}
  
#caption{
    position: relative;
    margin-top: 40px;
    width:100%;
   z-index:1;
  /*padding-left: 20px;*/
}

.captionText{
    font-weight: bold;
    font-size: 51.5px;
    line-height: 65px;
}

.miniFont{
   font-size:35 !important;
   line-height:1 !important;
}

...

</style>


<div id="sponsorCylcer"> 
 <% 
 var imageError= TemplateVarialbes.ImageRedirectURL+ poster.get('irn') + TemplateVarialbes.ImageSizePrefix
 var imageError= TemplateVarialbes.ImageRedirectURL+poster.get('irn') + TemplateVarialbes.ImageSizePrefix 
 %>
 <div id="poster_1" class="">
 <img onError="this.onerror=null;this.src='<% print(imageError) %>';" src="images/<%= poster.get('irn') %>.jpg" />
 <div id="imageCaption"> <%= poster.get('caption') %><br> <%= poster.get('copyright') %></div>
 </div>


 <% if (poster.get('type').indexOf("poster") !== -1 && displayCaption==true){ %>
 <div id="datesAndInfo">
 <h1>from <%= poster.get('startDate') %> till <%= poster.get('endDate') %></h1>
 </div>

 <%} else{ 
 if ( displayCaption==true){ 

 %>
 <div id="caption">
 <div class="captionText <% if( miniFont!=false){print(miniFont)} %>" > <%= poster.get('strapline').replace(/(?:\r\n|\r|\n)/g, '<br />') %> </div>
 <%} } %>
 </div>
</div>>


 <% if (poster.get('type').indexOf("poster") !== -1 && displayCaption==true){ %>
<div id="datesAndInfo">
<h1>from <%= poster.get('startDate') %> till <%= poster.get('endDate') %></h1>
</div>

<%} else{ 
if ( displayCaption==true){ 

%>
<div id="caption">
<div class="captionText <% if( miniFont!=false){print(miniFont)} %>" > <%= poster.get('strapline').replace(/(?:\r\n|\r|\n)/g, '<br />') %> </div>
<%} } %>

Once the template is loaded, the poster displays, and that’s pretty much job done for that particular mode, except that we want posters to be displayed on a loop, and so the view reloads the template every x seconds depending on what has been set for that machine using the digital signage administration panel. A master timer controls how long the poster loop has been running for and moves to the next mode after that time. Additionally a counter keeps a note of the number of posters displayed and passes that number across to the next mode so when poster mode comes back round, the next poster in the sequence is loaded.

Remarks
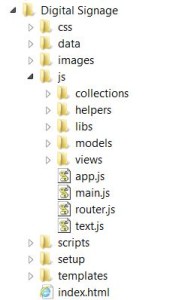
folder structureUsing the require backbone framework for the application has kept things tidy throughout the project and has meant that extending new modes and adding database fields is as hassle free as possible. It is easy to navigate to the exact file to make the changes – which is pretty important once the app gets beyond a certain size. Another good thing is that bugs in one mode don’t break the app, and if there is no content for a mode the app flips to the next without complaining – this is important in the live environment where there are no keyboards in easy reach to ‘OK’ any error messages.


Furthermore the app is robust – we have it running on Ubuntu, Windows 7 [in Chinese], and a Raspberry PI, and it hasn’t crashed so far. Actually if it does its job right, the application architecture  won’t get noticed at all (which is why I am writing this blog)  – and the content will shine through…. one reason I have avoided any scrolling text or animations so far – posters look great just as they are, filling the screen.

Now that our content editors are getting to grips with the system, we are starting to gather consensus about which modes should be prominent, in which places – after all if you have different modes, not every visitor will see the same content – so it there any point in different modes?  Let the testing commence!


Acknowledgements

Thanks to Thomas Davis for the helpful info at backbonetutorials.com and Andrew Henderson for help Killing Zombies.


Using Trello as a task manager

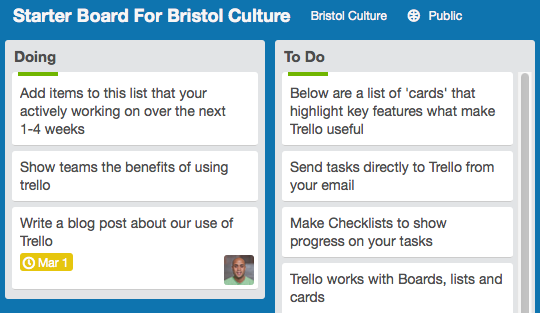
Screen shot showing trello in action

At the museum (Bristol Culture) we use Trello, a free online task management tool to help us work together. Trello allows you to assign tasks for projects to individuals and groups of collaborators and track delivery of said tasks in a simple visual way. For example you can see our 2014-2020 Digital roadmap which is a series of ‘To-Do’ lists of projects and tasks ranging from small to multi-year, each with an assigned member of staff responsible. This particular programme of work is publicly viewable to show transparency and let potential partners see our areas of focus. Trello calls each ‘chunk’ a board. A board has one or more ‘To-Do’ lists, a status of private, shared to a group or public and members who can change the board items which are called ‘cards’.

We use the following lists across all boards as our default view:

  • Doing – what we’re actively working on for the next 1-4 weeks
  • To Do – a long list of tasks waiting to be moved to ‘doing’
  • Stalled – waiting on an action before it can be progressed e.g. changing our opening hours needs cabinet approval which takes several months so it us stalled until they make a decision and can then be moved to ‘Doing’ again
  • Done – a list of tasks that have recently been completed and sit here for the group to review together before being ‘archived’ and moved
  • Reading/Reference – a list of useful items for the group to read e.g. new policy documents

Why use trello?

Clarity of communication and speed. With over 200 staff and countless partners and collaborators keeping track of what we’re all up to is impossible through email or staff meetings. Trello is specifically made to help show ‘one to many’ what is happening, who is responsible, what an items status is and what has recently been completed . For example when the core management team (Laura, Ray, Phil and myself) make a decision that affects others we note the  date, subject  and decision outcome for all to see. Trello has a search facility making it quick to find outcomes.

We’re starting to find that trello makes lots of meetings more focused and you don’t lose track of where you are. I use it for all my team 1:1s (nothing confidential of course), key programmes and projects. I love that it works on any device making me flexible about when and where I work and it’s simple to use for all. Management team review trello on a weekly basis together using a large TV, saving paper in the process.

Check out the starter board which introduces our staff to Trello and let me know what you think of Trello.