Category Archives: Digital services

100 days of using Shopify POS tills

We’ve just passed our 100 day mark since the introduction of Shopify till system in our retail shops. In case you don’t intend on reading the whole post, i’ll tell you now that we’re still using Shopify and i think it’s safe to say it is a success.

In this post I want to cover us going live, what features we use at the moment and what our next steps are.

Choosing Shopify

Our previous system was never properly setup and as a team we didn’t take advantage of its potential. I could of stuck with it but I saw this as an opportunity to explore using the latest shopping cart technology from the web. I’m a big fan of popular tools that I’ve seen ‘scale’ regardless of the sector. I had heard about lots of arts/museum sector specific approaches which quite frankly scare me. As a sector we aren’t really all that ‘special’ when it comes to doing normal things like running a shop. So instead of looking at any of these potentially risky solutions where the market is small and we can get tied to one small supplier I just went straight to looking at what local shops and market stalls were using as i’m treating our retail as a small business so what better place to look. All of these were using web services via tablet or phone. Having attended a Shopify workshop back in June 2014 run by Keir Whitaker I felt that it had what the other systems had to offer so why not use this – no long spec document just a nose for good software and services.

Fast forward to launch

After an initial alpha use of Shopify using the free trial (tip: use the 7 day trial as your alpha test so you have no money to front) I felt happy to use Shopify with the public. Our fallback was to keep the old system plugged in and as we use a separate card reader, we could easily manually take orders with that and a calculator if we really got jammed up.

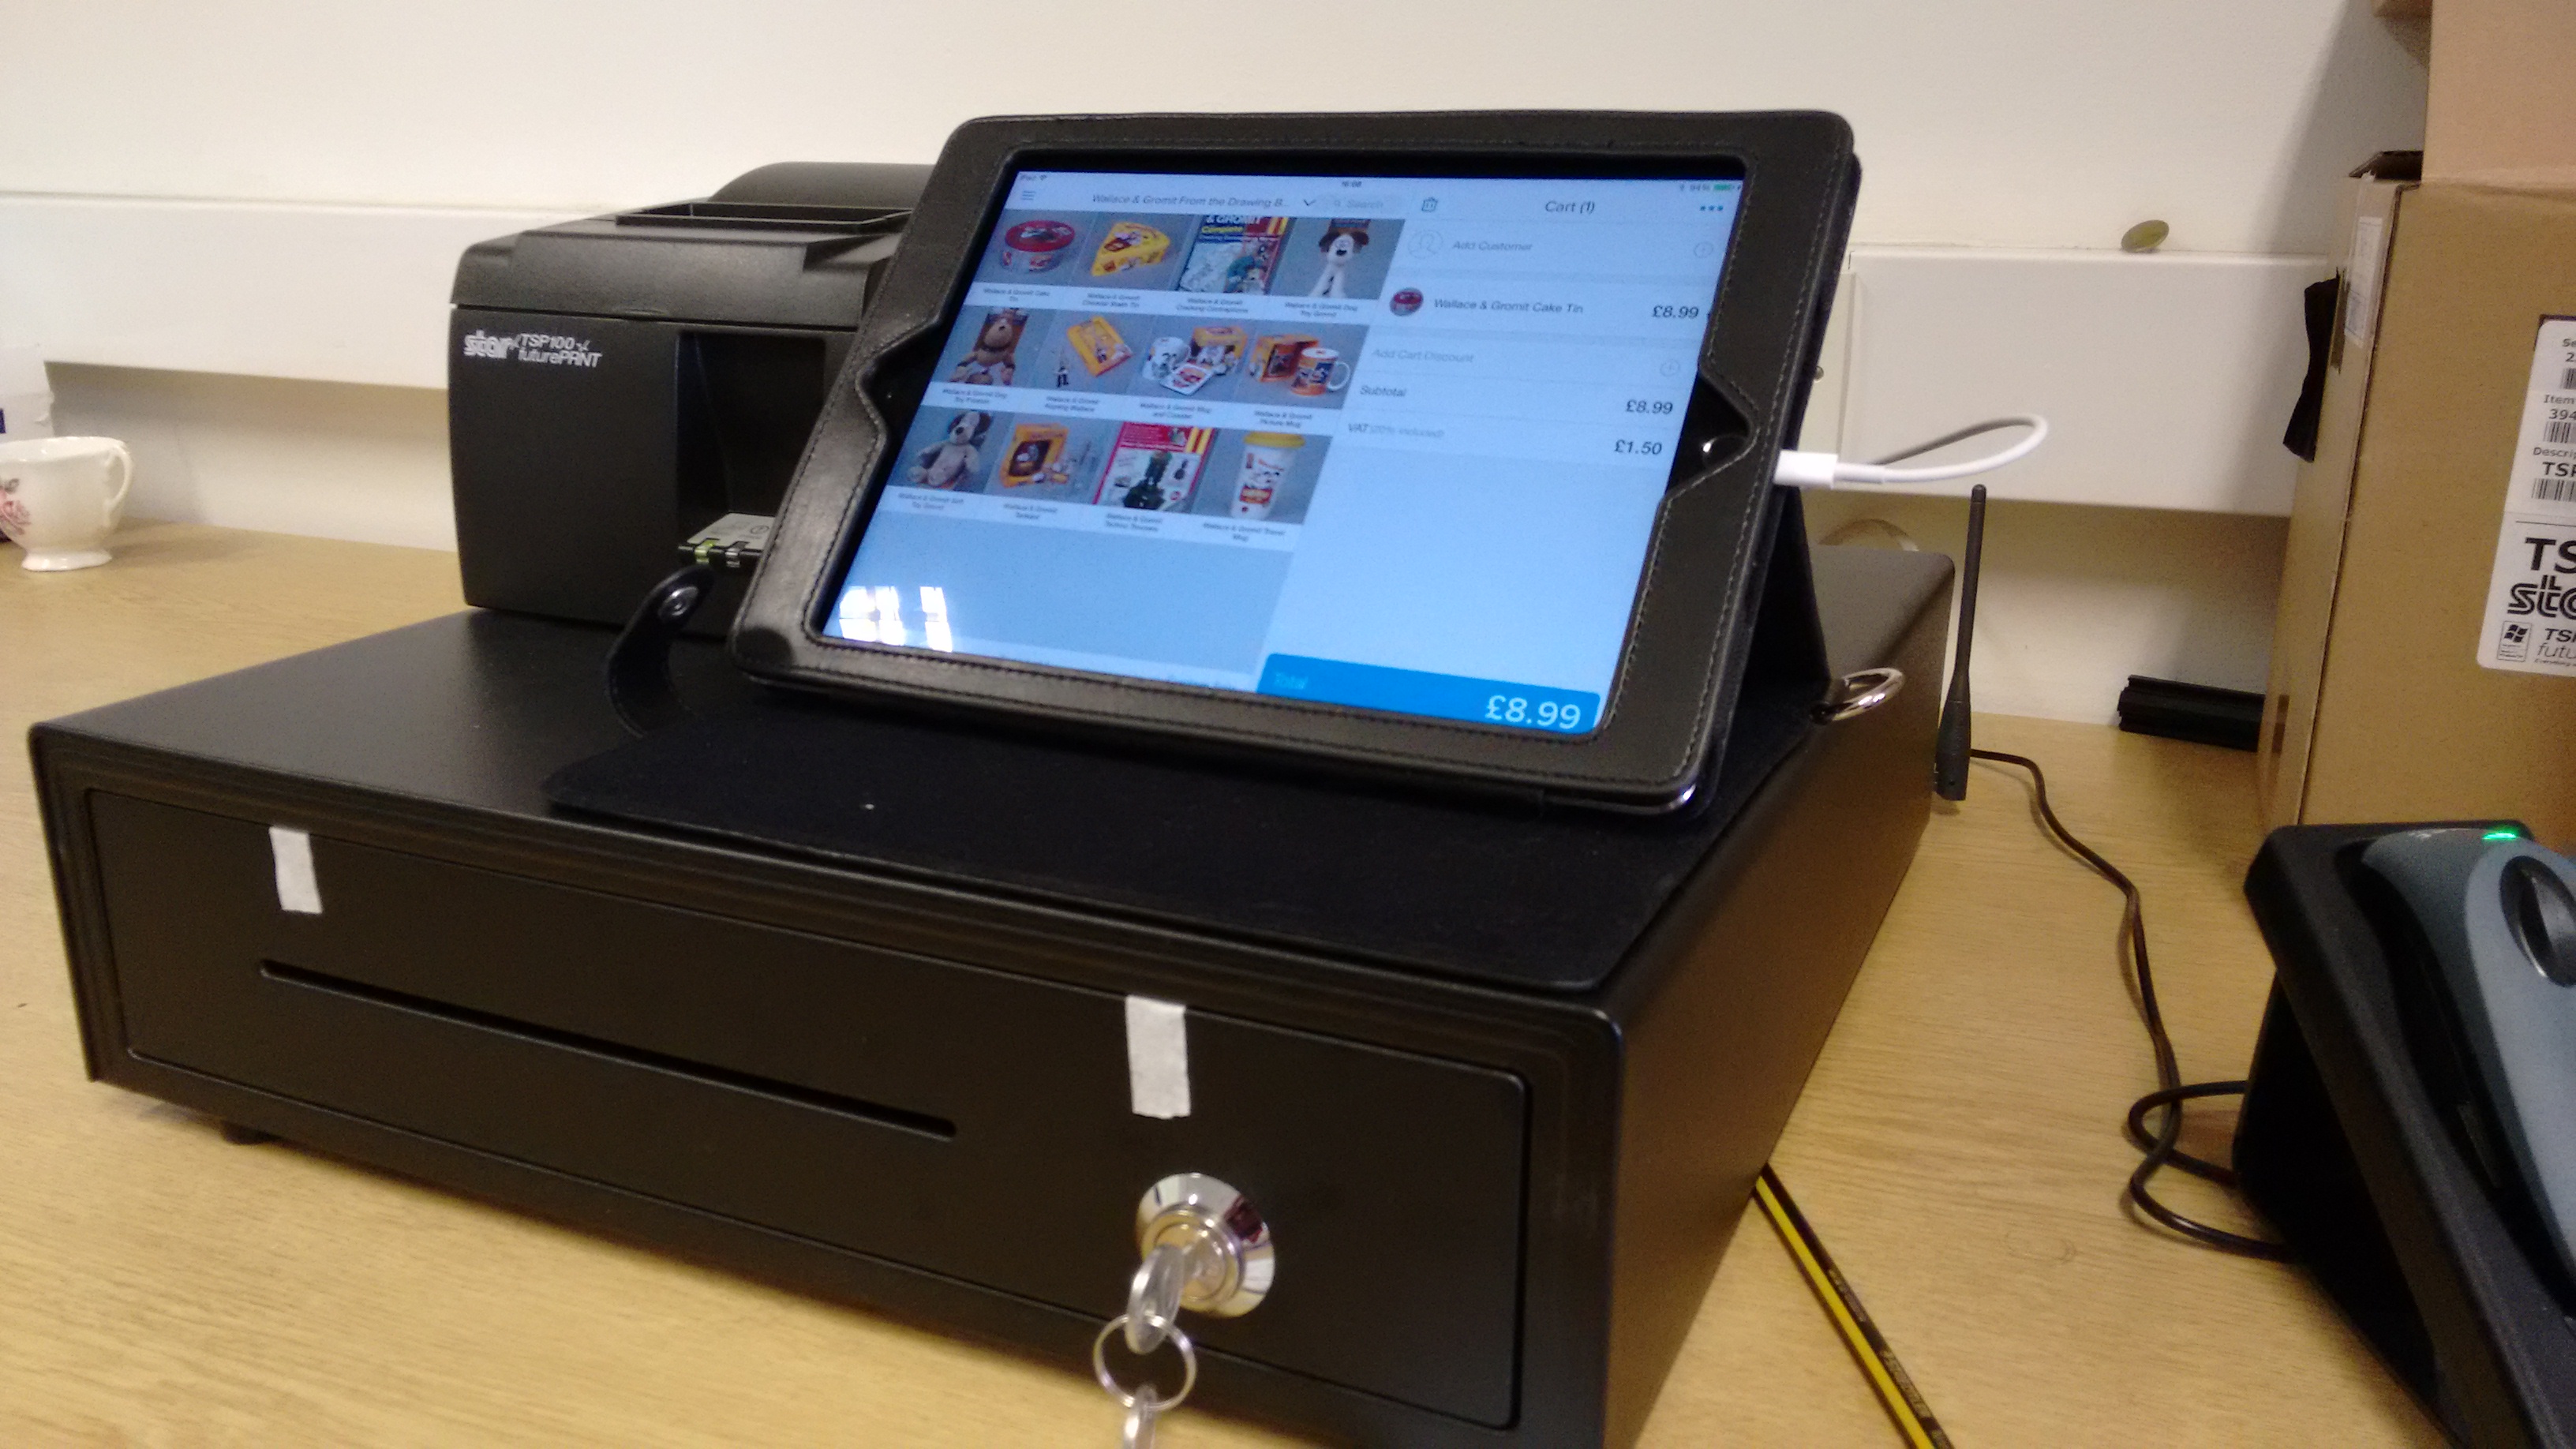
We decided to launch in early May at Bristol Museum & Art Gallery. We decided to do one shop first and then if all went well we’d do live at M Shed, followed by our tills used by the exhibition team.

As Shopify is pretty user friendly we showed Helen how to add products, how to make a custom sale and how to cash up at the end of the day in less than 20mins. It turns out that Helen had never used an iPad before, let alone Shopify. But within minutes Helen was comfortable enough to plough on with only a little arm twisting from me.

Rather than add 100s of products to the inventory we decided to use the ‘custom sale’ option on the first day and then add any purchased products to the inventory retrospectively. As a word of advice, i think this approach makes the most sense instead of committing many hours to adding products to the Shopify inventory which you may or may not run with. Instead, add as you go.

On the first day I made sure that we had both Zahid and myself available. I spent the first ‘live’ hour down in the shop. Within an hour it was clear that I wasn’t needed. By the day of the first day Helen and Zahid knew way more than I did – in this type of case i’m glad to be made redundant!

After two days Helen asked us to remove the old system as she was very happy with how things were progressing. We have a small retail team of four part-time staff and a small bank of casual staff. Within 2-3 weeks I was getting staff thanking me for introducing the new system. In my previous two years I’ve never had such positive feedback. After the third week we also replaced our M Shed till too. On week six we also used this for our third till which is used to buy tickets for our exhibition (William Hogarth: Painter and Printmaker).

Helpful documentation and support

One of the things I love about modern day web services is that they normally offer good documentation and Shopify is no different. This not only helps us to learn about how to best use the service but saves any of us having to write lengthy support documentation. I’ve since used their live online chat a few times when i’ve got stuck and it’s 24/7. A service i’m sure many of the museum POS vendors can only dream of offering. You can ring, live chat, email or use the forums. All of which help staff when none of us digital types are around, which is the way it should be.

Mobile app for the win

I have a great retail team led by Helen Lewis. In theory I just need to know our current financial position. The mobile app lets me see live sales income for the last 90 days. This alone is a leap forward for POS and i get ‘POS envy’ now by all other retail managers whenever I show them. Furthermore I can see what product inventory level is is at anytime and i can scan barcodes to make sales if i really wanted to. I’m currently keeping an eye on our Hogarth mugs, scarfs, a book by Louise Brown and drinks. All new products that I like to track.

Reporting sales

To keep the cost down there a number of features which don’t come as standard and reporting is one of them. We have paid for the reporting features which we mostly use for splitting vat/non-vat and exhibition tickets at this point. In the next few months we will really get our head around what reports we want.

A few problems and issues

We’re very happy so far with our shopify service but there have been a few teething problems worth mentioning.

We hit our first major technical snag – till drawer says No!

Our exhibition till has a unique challenge compared to our retail shops. We have over 50 visitor assistants. For each day of the exhibition we may have any one or more of them on the till. This poses a few challenges, mainly around processes and training. Some people had no problems but others really struggled with the idea of an iPad for a till. Nothing too bad. But then it happened. I got a call to say that the exhibition till wasn’t working. I went down and sure enough it was working. False alarm right? Another call 30mins later. This time I could see the problem. Although we could use the Shopify app, the till cash drawer refused to open. Turn it off, turn it back on. Boom. Fixed…. so I thought. This kept happening, time after time. Anyway it turns out that although Shopify will run perfectly happily offline, the cash drawer NEEDS wifi to be triggered to open. A major problem that made lots of visitor assistants quite reluctant to use the till. The problem only occurred on one of the four tills. Zahid tracked down the issue to the router. Apparently there is a known issue with some routers – despite it working fine with the same router elsewhere. Zahid swapped out the router and the problem hasn’t come back. Luckily for us we could use the shop as a fallback till but this wasn’t the best customer service period.

Costs of goods isn’t standard

By default there isn’t a feature to include the ‘cost of goods – COGS’ which are essential for knowing the price you paid against the retail price and thus your profit margin. How did I miss that in the alpha! Luckily one of the reasons I chose Shopify was for its adaptability. Shopify has a useful feature to allow them or third parties to make apps for beefing up the default service. One of these, deepmine looks like it has COGS so we’ll be trialling this very soon.

Not many hints and tricks yet

I haven’t found much information about using Shopify POS as it is still quite new. This means that it hasn’t been super fast to find answers to some of our issues. One of the reasons i’m writing this is to increase that information pool. Oh and there is no public roadmap for what’s coming so follow the blog to stay in the loop

What’s coming next

Now that we’re comfortable with Shopify we’re starting to turn our attention to the next phase of work.

  • Trial deepmine app to get COGs and deep reporting
  • Setup better custom reports to help staff
  • Offer group workshops on basic training and reporting
  • Add inventory levels to all products
  • Add photos to all products
  • Explore email upsell and sales offers

Get in touch

I’ve had several chats with other museums who spotted by last blog post asking about Shopify. Please do get in touch by phone 0117 922 3571 or zak.mensah@bristol.gov.uk if you want me to help you with anything around our use of Shopify. We’ll also be happy to be paid consultants to set up your service if you need a proper hand.

Anatomy of our Digital Signage Web App

At this stage in the development of our digital signage, we have a working release of the software in the live environment, and we are focussing on training, improvements to the design and data structure for the next version. This post is about the nuts and bolts of how the client-side app works, while it is still fresh.

Mode Schematic

Firstly, it is a single page web application – loaded upon calling index.html from a web browser.  Inside the index.html are just the basics you’d expect. The magic is all controlled via a master JavaScript file called require.js. This library is used to pull together all of the source code in the right order and makes sure files don’t get loaded twice etc. All of the content of the app is loaded and removed via a single content div in the body.

index.html 
(... some bits removed...check the GitHub page for the whole lot)


<html>
  <head><title>BMGA Digital Signage</title>
     <link rel="stylesheet" href="css/styles.css"> 
     <script data-main="js/main" src="js/libs/require/require.js"/>    
  </head>
  <body class="nocursor">
   <div id="mainContent" > </div></div>
  </body>
</html>

The first JavaScript to load up is main.JS. This simple file follows theRequireJS format, which is used to alias some of the code libraries which will get used the most such as JQuery.

//main.js 

require.config({

 paths:{
     jquery:'libs/jquery/jquery-min',
     underscore:'libs/underscore/underscore-min',
     backbone:'libs/backbone/backbone-min', 
     templates: '../templates'
 }
 })

require([

"app"], function(App) {
App.initialize();
});

Next up is main.js. This loads up the code libraries required to start the app, and brings in our first global function – used to close each ‘view’. For a single page app it is really important to destroy any lingering event handlers and other bits which can take up memory and cause the app to go a bit crazy – something that Backbone apps have difficulties with, and otherwise known as Zombie Views. Killing Zombies is important.

//main.js
define([
 'jquery', 
 'underscore', 
 'backbone',
 'router'

], function($, _, Backbone, Router){
var initialize = function(){

 
  Backbone.View.prototype.close = function () { //KILL ZOMBIE VIEWS!!!!
      this.undelegateEvents();
      this.$el.empty();
      this.unbind();
  };
 

   Router.initialize();
 };

 return { 
     initialize: initialize
 };
});

It gets a bit more fun next as we call the backbone ‘router’ – and from now on I’ll only add snippets from the files, to see the lot head to GitHub. The router is what drives navigation through each of the modes that the screens can display. Each route takes its parameters from the url and so this means we can control the modes by appending the text ‘sponsors’, ‘posters’ or ‘events’ to the index.html in the browser.

In addition to the mode we can pass in parameters – which poster to display, which page of sponsors, which venue etc. This was a solution to the problem of how to remember which posters have not yet been shown. If you only wish the poster mode to last 40 seconds, but you’ve got lots of posters – you need to remember which posters come next in the sequence. Additionally as you loop through modes, you need to pass along each parameter until you are back on poster mode. This is why every route has all the parameters for venue and poster.

This slightly convoluted situation has arisen as we are using a page refresh to flip between modes and so without relying on local storage our variables are only around as long as the page lasts

//router.js 

 var AppRouter = Backbone.Router.extend({
 routes: { 
 'sponsors(/venue:venue)(/stick:stick)(/logo:page)(/poster:page)(/machine:machine)': 'sponsors', 
 'posters(/venue:venue)(/stick:stick)(/logo:page)(/poster:page)(/machine:machine)': 'posters', 
 'events(/venue:venue)(/stick:stick)(/logo:page)(/poster:page)(/machine:machine)(/date:all)':'events',

 }
 });

The code for a single route looks a bit like this and works as follows.  We start off with an option to stick or move – this allows us to have a screen stay on a particular mode. Then we look at our settings.JSON file which contains the machine specific settings for all of the signs across each venue. The machine name is the only setting help locally on the system and this is used to let each machine find their node of settings (loop times, etc.).

...
 app_router.on('route:posters', function(venue,stick,logoOffset,posterOffset,machine){
 
 
 var stick = stick || "move"
 var logoOffset=logoOffset||0
 var posterOffset=posterOffset||0;
 
 machineName=machine||'default'
 Allsettings=(JSON.parse(Settings))
 settings=Allsettings.machineName
 settings=('Allsettings',Allsettings[machineName])
 
 
 var venue = settings.location;
 
 if(Globals.curentView){
 Globals.curentView.close()
 }
 
 var venue = venue || "ALL"
 self.venue=venue
 
 var posterView = new PosterView({venue:self.venue,stick: stick,logoOffset:logoOffset,posterOffset:posterOffset,machine:machine,settings:settings,type: settings.eventTypes});
 
 posterView.addPostersFromLocaLFile();
 Globals.curentView=posterView


 }),
....

With all settings loaded, and filtered by machine name and the mode specified – we are ready to load up the view. This contains all of the application logic for a particular mode, brings in the html templates for displaying the content, and performs the data fetches and other database functions needed to display current events/posters…more on that in a bit

Amongst the code here are some functions used to check which orientation the image supplied is, and then cross reference that with the screen dimensions, and then check if that particular machine is ‘allowed’ to display mismatched content. Some are and some aren’t, it kinda depends. When we push a landscape poster to a portrait screen, we have lots of dead space. A4 looks OK on both but anything squished looks silly. So in the dead space we can display a strapline, which is nice, until there is only a tiny bit of dead space. Oh yep, there is some code to make the font smaller for a bit if there is just enough for a caption..etc.   ….turns out poster mode wasn’t that easy after all!

//view.js
 
define([
 'jquery',
 'underscore',
 'backbone',
 'text!templates/posters/posterFullScreenTemplate_1080x1920.html',
 'text!templates/posters/posterFullScreenTemplate_1920x1080.html',
 'collections/posters/PostersCollection',
 'helpers/Globals',
], function($, _, Backbone, posterFullScreenTemplate ,posterFullScreenTemplateLandscape,PostersCollection,Globals){

 var PosterView = Backbone.View.extend({
 
 el: $("#eventsList"),
 
  addPostersFromLocaLFile: function(){ 
 
 var self = this;
 self.PostersCollection = new PostersCollection({parse:true}) 
 self.PostersCollection.fetch({ success : function(data){
 self.PostersCollection.reset(data.models[0].get('posters'))
 self.PostersCollection=(self.PostersCollection.byEventType(self.settings.eventTypes));
 self.PostersCollection=(self.PostersCollection.venueFilter(self.venue));
 self.renderPosters(self.PostersCollection)
 
 $( document ).ready(function() {
 
 setInterval(function(){ 
 
 self.renderPosters(self.PostersCollection)
 if(self.stick=="move"){ 
 setTimeout(function() { 
 self.goToNextView(self.posterOffset)
 }, settings.posterMode_time * 1000);
 }
 }, settings.posterLoop_time * 1000);
 })
 
 }, dataType: "json" });
 
 },
 
 renderPosters: function (response) { 

 if( self.posterOffset>= response.models.length){self.posterOffset=0}
 
 var width = (response.models[self.posterOffset].get('width'))
 var height = (response.models[self.posterOffset].get('height'))
 LANDSCAPE=(parseInt(width)>=parseInt(height))
 ImageProportion = width/height 
 
 if(LANDSCAPE==true){break;}
 self.posterOffset++ 
 }
 }
 
 if(self.orientationSpecific==2){
 
 //enforced orientation lock
 while(LANDSCAPE==false ){ 
 
 if( self.posterOffset>= response.models.length){self.posterOffset=0}
 
 var width = (response.models[self.posterOffset].get('width'))
 var height = (response.models[self.posterOffset].get('height'))
 LANDSCAPE=(parseInt(width)>=parseInt(height))
 if(LANDSCAPE==true){break;}
 self.posterOffset++ 
 }
 }
 
 ImageProportion = width/height 
 if(ImageProportion<=0.7){miniFont='miniFont'}
 if(ImageProportion<=0.6){miniFont='microFont'}
 if(ImageProportion<=0.5){miniFont='hideFont'}
 if(ImageProportion>=1.4){miniFont='hideFont'}
 console.log('ImageProportion'+ImageProportion) 
 self.$el.html(self.PostertemplateLandscape({poster: response.models[self.posterOffset],displayCaption:displayCaption,miniFont:miniFont},offset=self.posterOffset,TemplateVarialbes=Globals.Globals)); 
 

 ....


return PosterView;
 
});

Referenced by the view is the file which acts as a database would do, called the collection, and there is a collection for each data type. The poster collection looks like this, and its main function is to point at a data source, in this case a local file, and then to allow us to perform operations on that data. We want to be able to filter on venue, and also on event type -(each machine can be set to filter on different event types)  and so below you see the functions which do this… and they cater for various misspellings of our venues just in case 🙂

//postercollection.js 

define([
 'underscore',
 'backbone',
 'models/poster/posterModel'
], function(_, Backbone, SponsorModel){

 var PosterCollection = Backbone.Collection.extend({
 
 sort_key: 'startTime', // default sort key
 

 url : function() {
 var EventsAPI = 'data/posters.JSON'; 
 return EventsAPI
 },
 
 byEventType: function(typex) { 
 typex=typex.toUpperCase()
 filteredx = this.filter(function(box) {
 
 var venuetoTest = box.get("type")
 
 if( box.get("type")){
 venuetoTest = (box.get("type").toUpperCase())}
 
 
 return typex.indexOf(venuetoTest) !== -1;
 }); 
 return new PosterCollection(filteredx);
 },


 venueFilter: function(venue) { 

 if(venue.toUpperCase()=="M SHED"){venue = "M SHED"}
 if(venue.toUpperCase()=="BMAG"){venue = "BRISTOL MUSEUM AND ART GALLERY"}
 if(venue.toUpperCase()=="MSHED"){venue = "M SHED"}
 filteredx = this.filter(function(box) {
 var venuetoTest = box.get("venue")
 
 if( box.get("venue")){
 venuetoTest = (box.get("venue").toUpperCase())}
 
 return venuetoTest==venue ||box.get("venue")==null
 }); 
 return new PosterCollection(filteredx);
 
 },
 
 parse : function(data) { 
 return data 
 }

 
 });

 return PosterCollection;

});

Referenced by the collection is the model – this is where we define the data that each poster record will need. One thing to watch here is that the field names match exactly those in the data source. When backbone loads in data from a JSON file or API, it looks for these field names in the source data and loads up the records accordingly (models in backbone speak) . So once the source data is read, we populate our poster collection with models, each model contains the data for a single poster etc.

//postermodel.js


 define([
 'underscore',
 'backbone'
], function(_, Backbone) {

 PosterModel = Backbone.Model.extend({

 defaults: {
 
 category: 'exhibition',
 irn: '123456' ,
 startDate: '01/01/2015' ,
 endDate: '01/01/2015' ,
 venue: 'MSHED' ,
 caption: 'caption' ,
 strapline: 'strapline' ,
 copyright: '© Bristol Museums Galleries and Archives' 
 

 },
 initialize: function(){
 //alert("Welcome to this world");
 },
 adopt: function( newChildsName ){
 // this.set({ child: newChildsName });
 }
 })

 return PosterModel;

});

With the collection loaded with data, and all the necessary venue and event filters applied, it is time to present the content – this is where the templates come in. A template is an html file, with a difference. The poster template contains the markup and styling needed to fill the screen, and uses the underscore library to insert and images into the design.

/*posterFullScreenTemplate_1080x1920.html */

<style>

body{
    background-color:black;
    color: #BDBDBD;
}
  
#caption{
    position: relative;
    margin-top: 40px;
    width:100%;
   z-index:1;
  /*padding-left: 20px;*/
}

.captionText{
    font-weight: bold;
    font-size: 51.5px;
    line-height: 65px;
}

.miniFont{
   font-size:35 !important;
   line-height:1 !important;
}

...

</style>


<div id="sponsorCylcer"> 
 <% 
 var imageError= TemplateVarialbes.ImageRedirectURL+ poster.get('irn') + TemplateVarialbes.ImageSizePrefix
 var imageError= TemplateVarialbes.ImageRedirectURL+poster.get('irn') + TemplateVarialbes.ImageSizePrefix 
 %>
 <div id="poster_1" class="">
 <img onError="this.onerror=null;this.src='<% print(imageError) %>';" src="images/<%= poster.get('irn') %>.jpg" />
 <div id="imageCaption"> <%= poster.get('caption') %><br> <%= poster.get('copyright') %></div>
 </div>


 <% if (poster.get('type').indexOf("poster") !== -1 && displayCaption==true){ %>
 <div id="datesAndInfo">
 <h1>from <%= poster.get('startDate') %> till <%= poster.get('endDate') %></h1>
 </div>

 <%} else{ 
 if ( displayCaption==true){ 

 %>
 <div id="caption">
 <div class="captionText <% if( miniFont!=false){print(miniFont)} %>" > <%= poster.get('strapline').replace(/(?:\r\n|\r|\n)/g, '<br />') %> </div>
 <%} } %>
 </div>
</div>>


 <% if (poster.get('type').indexOf("poster") !== -1 && displayCaption==true){ %>
<div id="datesAndInfo">
<h1>from <%= poster.get('startDate') %> till <%= poster.get('endDate') %></h1>
</div>

<%} else{ 
if ( displayCaption==true){ 

%>
<div id="caption">
<div class="captionText <% if( miniFont!=false){print(miniFont)} %>" > <%= poster.get('strapline').replace(/(?:\r\n|\r|\n)/g, '<br />') %> </div>
<%} } %>

Once the template is loaded, the poster displays, and that’s pretty much job done for that particular mode, except that we want posters to be displayed on a loop, and so the view reloads the template every x seconds depending on what has been set for that machine using the digital signage administration panel. A master timer controls how long the poster loop has been running for and moves to the next mode after that time. Additionally a counter keeps a note of the number of posters displayed and passes that number across to the next mode so when poster mode comes back round, the next poster in the sequence is loaded.

Remarks

folder structure
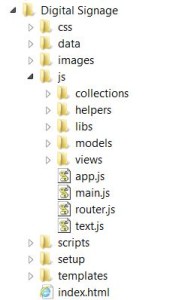
Using the require backbone framework for the application has kept things tidy throughout the project and has meant that extending new modes and adding database fields is as hassle free as possible. It is easy to navigate to the exact file to make the changes – which is pretty important once the app gets beyond a certain size. Another good thing is that bugs in one mode don’t break the app, and if there is no content for a mode the app flips to the next without complaining – this is important in the live environment where there are no keyboards in easy reach to ‘OK’ any error messages.


Furthermore the app is robust – we have it running on Ubuntu, Windows 7 [in Chinese], and a Raspberry PI, and it hasn’t crashed so far. Actually if it does its job right, the application architecture  won’t get noticed at all (which is why I am writing this blog)  – and the content will shine through…. one reason I have avoided any scrolling text or animations so far – posters look great just as they are, filling the screen.

Now that our content editors are getting to grips with the system, we are starting to gather consensus about which modes should be prominent, in which places – after all if you have different modes, not every visitor will see the same content – so it there any point in different modes?  Let the testing commence!


Acknowledgements

Thanks to Thomas Davis for the helpful info at backbonetutorials.com and Andrew Henderson for help Killing Zombies.


Using Shopify to run an affordable museum shop till system (POS)

Photo of Shopify till - iPad, till and printer first use

Across the service we typically take payments for our two major retail shops and  ‘paid for’ exhibitions at Bristol Museum & Art Gallery and M Shed. To date we have never set the tills up to give us useful reporting beyond the “groups of products” e.g. ‘books’ or ‘cards’ which is simply not good enough [no shots].  We need useful data to help us understand our business and improve our service. GDS refer to ‘designing with data‘ in their design principles and I see no reason not to be the same across the museums, especially with trading and IT retail systems.

During 2015-16 we will design our retail offer based on good usable data about our visitors, product ranges and sector trends.

Introducing Shopify Point of Sale (POS)

In the not too distant past I used to do freelance web projects and shopify would regularly appear on my radar. It is an affordable (from $9 a month) web shop that recently introduced the ability to run as a till system called Shopify POS. Due to its popularity with web folk I trust, our desire to get a move on and its feature set to cost ratio, I figure we have nothing to lose but try it out – we have no historic data either so anything is better than our current position.

Also, we’re an Arts Council England lead for digital so what better problem to solve than affordable till systems to kick off our 2015-18 partnership?

We will use Shopify POS to:

  • Take cash and card payments
  • Manage our products and stock level
  • Provide both retail and service management with regular performance reports
  • Act as a mininum viable service to help plan for the future
  • Dip our toe in the water with an online shop offer (both POS and web shop are interelated making it easy to do)

Getting started

I made a “management” decision to switch POS and so this is an enforced project for the retail team who have understood my reasoning are behind the project. I have said that we have nothing to lose but this may not work and i’ll hold my hands up if we fail. We had a call with the Shopify team and knew we needed some new kit:

  • Two paid instances of Shopify POS – one for each retail shop. I am disappointed there is to no way to have multiple shops from one account even if it was a discounted upgrade. This will enable us to report accurately each shop as its own business
  • iPad air 2 with Shopify (use the 7 day trial first) with retail add-on and reporting ($59 per month)
  • Bluetooth barcode reader, till drawer and receipt printer from uk reseller POS hardware for approx. £250 ex Vat (turns out you can use any drawer though as they are standard
  • Reuse existing card reader (approx £20 per month)
  • iPad secure stand
  • Router to avoid public wifi and maintain security – fitted by IT services

First steps

  1. Test a proof of concept – Zahid and Tom did a stand up job of getting the system to play nice with our infrastructure and i can’t thank them enough as this proved to be a pain for an unknown reason on our network.
  2. Once we had our test ‘alpha’ system working, we confirmed that IT were happy for us to proceed. They generally like projects that they don’t have to get involved in too much! As we’re using the existing corporate contract for our card payments which never touch Shopify there isn’t a security risk at that point AND it doesn’t touch our finance system. Essentially Shopify is “off” the network and at worse we expose our reporting and products – secure passwords for staff is the biggest challenge!
  3. Add our MANY products. Our retail and admin team are working on this at the moment
  4. ‘Beta’ Test over the week of 27th April alongside the existing system with our retail manager Helen who is critical to the success of the project
  5. Show the retail team how to use the system and get their feedback – after all they need to use and champion the project and service

Next steps

Assuming staff are happy and we’re getting the data we need I plan to put the service into ‘live’ starting 1st May so we can get 11 months usable data. We’ll be sharing our progress on the blog. PLEASE get in touch if you have anything to help us make a better service or have any questions.

A full shop till system for unless than £1000 a year…..let’s see!