In July 2022 at M Shed, we launched our exhibition ‘Think Global: Act Bristol’. It’s an exhibition that informs the public on Climate Change as a global issue, whilst showing how Bristol can and how Bristol is acting to fight climate change. An important topic that reaches through various aspects of society, including nature.
This Interactive was thought up to be displayed in the ‘Nature’ section of this exhibition. Its purpose? To allow the public to accession our collection of Lepidoptera. This is done by entering the data shown in the photographs of our Lepidoptera, these Lepidoptera are photographed with their original handwritten accession data in shot. This data input is done through a web form on a computer setup in gallery, which is accompanied by an interactive projection wall.
The interactive wall element is to give people a fun interactive experience in gallery by moving the Lepidoptera with their movement in front of the wall. As well as this, the wall plays animations after an accession entry has been submitted and the animation is based on the data entered by a member of the public. There are 3 animations that can be displayed, one for each classification of our Lepidoptera: butterflies, moths and extinct species.
How it Works
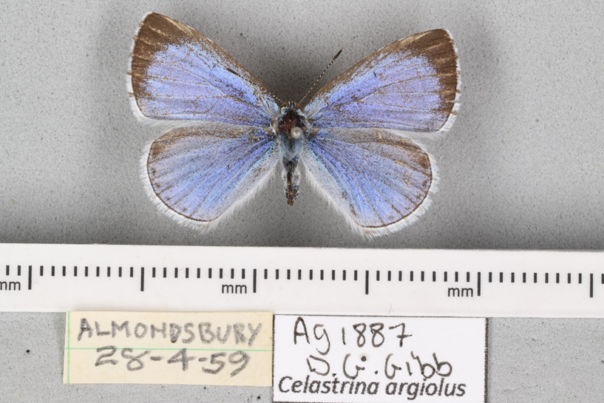
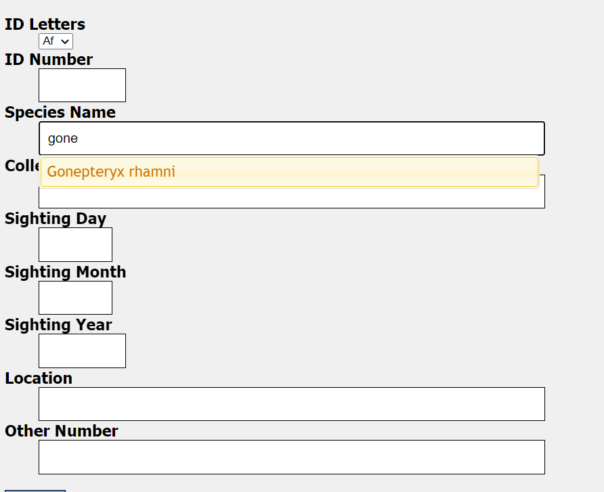
The interactive has a keyboard, mouse, screen, projector and camera. These are used to carry out the two functions of the interactive, accession data entry and the interactive wall. The form function is there to enable people to transcribe accession data from photos of our Lepidoptera with their paper accession data. An example of one of these images is shown below.
The form has the necessary fields with validation measures where necessary to ensure that the data entered is of use. The fields are as follows:
- ID Letters
- ID Number
- Species Name
- Collectors Name
- Sighting Day
- Sighting Month
- Sighting Year
- Location
- Other Number
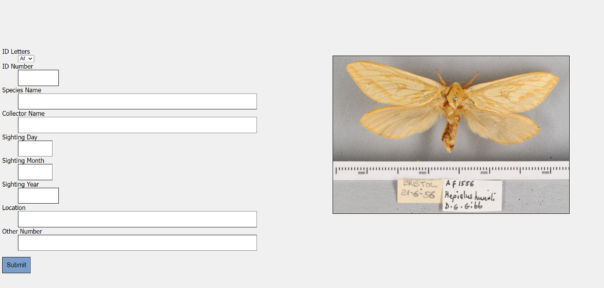
All of these fields have validation that restricts what data can be entered and some of them (Species Name, Collectors Name, Location) have an autocorrect feature. This kicks in after 4 correct characters in a row that correspond exactly to one of the possible entries for that field. This helps the public get the spelling correct and speeds up the process of entering in data. Having the autocorrect come up after 4 correct characters also deters spam data entries, at the member of the public can only submit an entry if it passes all 4 required validation points.
Once the data is entered correctly and submit is pressed a loading screen will appear, this loading screen will stay on until an animation corresponding with the type of Lepidoptera is shown on the interactive wall.
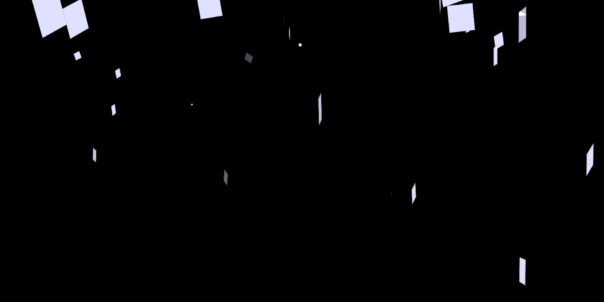
This interactive wall uses an ultra short throw projector to front project Lepidoptera onto a wall in gallery. The nature of this projector means that it is hard for people to cast shadows on the wall as the projector is mounted very close to the wall. As we were not able to rear project, this is the next best setup for this projection that also achieves an image over 3 and a half metres wide, which gives a good area for interaction.
There is a Kinect Azure mounted away from the wall which gets a depth image of everything in shot. This depth image is used to detect motion in front of the wall which in turn is used to affect butterflies in the area around where the motion is made. More Lepidoptera build up on the projection every time an entry is made in a day.
How it Works: The Nerd Version
The interactive runs on two systems with one system referencing the other. The data entry system is a Python Flask Server, which runs on Apache and can be run on a Windows PC or a Linux server. Though the server version I am yet to run in gallery due to some compatibility improvements and an inability to sort terms and conditions for this exhibition as of typing.
The server serves the client the data entry form with a randomly chosen image for transcription alongside it, the data inputed for each entry is saved to a timestamped json file. This file contains all the data fields as well as the filename for the image, meaning that all the data can be linked and sorted through afterwards in order to upload to our database. The server also updates a file that shows the latest species that has been entered, this is used by the Interactive Wall’s system to trigger animations.
The interactive wall runs on a Touchdesigner project that I created that uses a Kinect Azure to see people and know where to apply movement to the Lepidoptera in the projection. Touchdesigner is a real time visual development platform that allows you to create interactive installations, it’s a node based programming environment that allows interactives like this to be created in good time. Touchdesigner uses a particle system(particleGPU) that uses 3 videos, one for butterflies, moths and extinct species. These videos are then put on 2d planes that move and rotate in 3d space, these are the ‘particles’. These particles are affected by optical flow, which is generated by Touchdesigner analysing motion in the depth image, areas in which it believes there are motion are then used on the particleGPU video to move the particles in the affected areas.
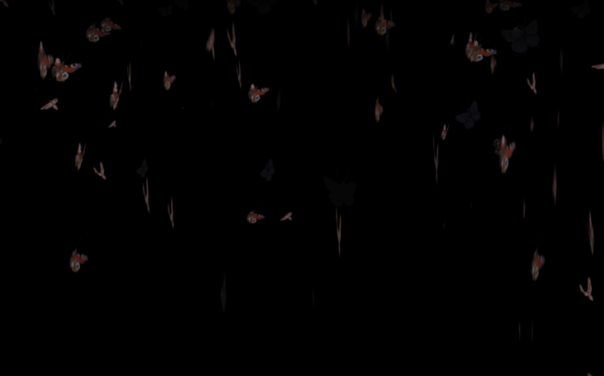
For the entry animations that play when an entry is made by the public there are 3 videos that play, again one for butterflies, moths and extinct species. Touchdesigner overlays these videos onto the particleGPU output when the Flask Server signals it’s had a new entry, Touchdesigner will then check which animation should be played to make sure it corresponds with the relevant Lepidoptera. This process works however it is not instantaneous and It’s one of the elements of this interactive I wish to improve for future use.
What’s next?
As of typing, the exhibition is yet to finish, I am hoping to add some improvements to the interactive before it’s derigged as having it in gallery would be a good test bench to make solid changes. These changes include:
- Reworked css to improve compatibility on smartphones
- Have the linux version up and running on our server so the public can enter data on their devices
- Decrease the latency between both systems by taking a different approach for their communication
- Add analytics to the Touchdesigner project so we can gather data
As of typing we have over 1500 entries from the public, which should enable us to have hundreds of these Lepidoptera catalogued, which is fantastic news for us! I think this interactive has big potential for other museums and I’m hoping that I can provide versions of this to other sites in future.
Currently it’s planned that this interactive will be returning in a permanent installation, so I plan to add these additional changes for this. I will post a second blog on labs once I’ve done some upgrades and analysed the data we have gathered from this exhibition.
Special thanks to Bristol Museums Development Trust and the ‘Think Global: Act Bristol’ exhibition for making this all possible.

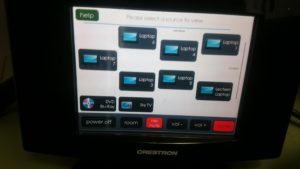
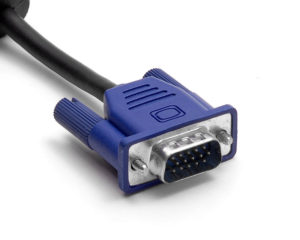 It’s all pretty smart. Pretty smart apart from the dreaded Video Graphics Array as the main interface, more commonly referred to as the VGA connector! For all this advanced technology, presenters still have to connect their devices with a cable.
 Apple products long ago ditched the VGA system in favour of min-display ports or “lighting ports”. A quick trip to any Apple store and an assistant will enthusiastically show how with a flick of the devices, a display can be “thrown” to another screen. It’s called Air Play and is Apple’s secure version of Wi-Fi streaming.
 purchased an ASUS RT-AC3200 Tri-Band Giga-Bit Wi-Fi router. This router is enormous with six aerials and looks like the Batmobile. I figured that it would have to be reliable and be able to cope with large amount of data traffic, so I got the most powerful but cost effective router I could find.
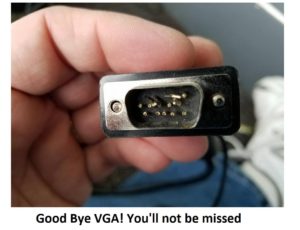
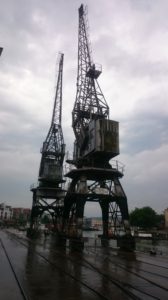
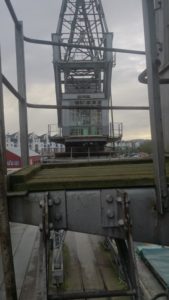
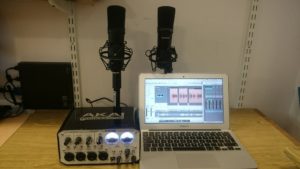 e, we arranged to meet in a nice quite corner of the L Shed store room. It’s a vast store, full of so many objects that there isn’t enough space to have them on permanent display. With both Jacqui and Heather sat at opposite ends of a table, I set up a pair of good quality condenser microphones. Each plugged into their own separate channel on my external sound card, an Akai EIE 4 channel usb sound card with great preamps and phantom powered for the mics. This in turn was hooked up to my MacBook and copy of Logic Pro. I recorded through each script a few times and was able to compile a seamless recording from the various takes. Once finished, I hard panned each channel left and right so that when each voice played back each would have its own speaker, left or right – crane 1 or crane 2.